
How to perform water mitigation after leaks
When Every Minute Counts: Water Mitigation After Leaks
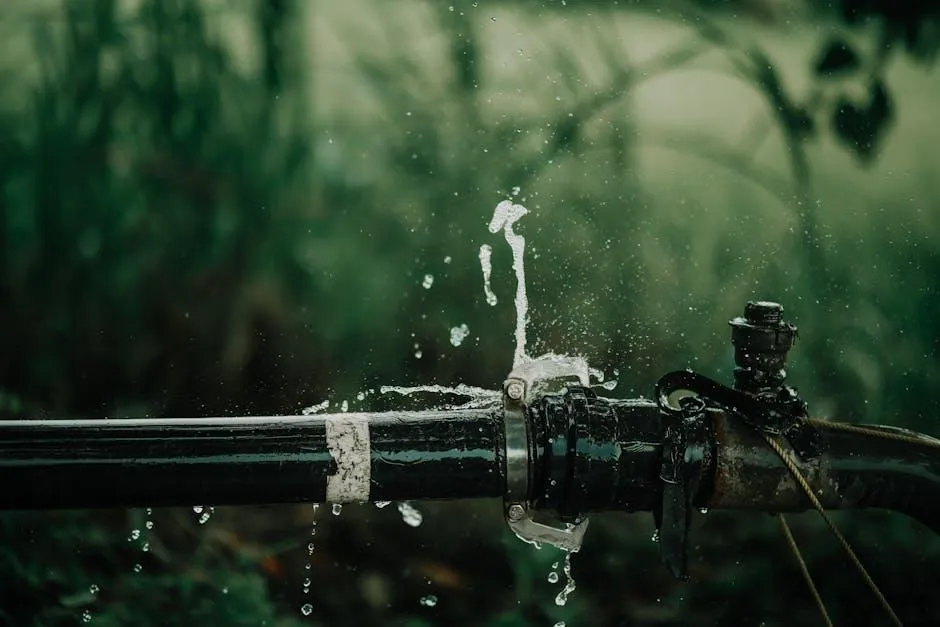
Water mitigation after leaks is the process of taking immediate action to stop water from spreading and prevent further damage to your home.
Quick answer — here's what to do right now:
Shut off the water source (main valve or fixture shutoff)
Turn off electricity in affected areas
Document the damage with photos and video
Remove standing water using towels, mops, or a wet/dry vacuum
Start drying with fans and dehumidifiers
Call a professional water mitigation company
On any given day, water damage emergencies affect around 14,000 homes across the US. And roughly 1 in 60 insured households files a water damage claim each year, with the average claim costing nearly $14,000.
That's a lot of money — and a lot of stress.
The hard truth is that water doesn't sit still. It travels behind walls, seeps under flooring, and soaks into insulation — often long before you notice a thing. What looks like a small drip can quietly become a major structural problem.
And mold? It can start growing in as little as 24 to 48 hours after water exposure.
Acting fast is the single most important thing you can do to protect your home, your health, and your wallet.
Understanding Water Mitigation vs. Restoration
When you’re standing in a puddle in your kitchen, "mitigation" and "restoration" might sound like the same thing. However, in property recovery, they represent two very different phases of the journey back to normalcy.
Think of it like a medical emergency. Water mitigation is the "first aid" or the "ER visit." Its goal is to stop the bleeding, stabilize the patient, and prevent the condition from getting worse. Water restoration, on the other hand, is the "reconstructive surgery" or "physical therapy" that happens once the immediate danger has passed.
Feature Water Mitigation (The Immediate Response) Water Restoration (The Recovery) Primary Goal Stop further damage and prevent mold. Return property to pre-loss condition. Timing Happens immediately (within hours). Happens after the area is completely dry. Actions Extraction, structural drying, sanitizing. Rebuilding, painting, flooring replacement. Focus Damage containment and stabilization. Reconstruction and aesthetics. Equipment Industrial pumps, air movers, dehumidifiers. Carpentry tools, drywall, paint, flooring.
According to the Quick Reference: Water Damage Response in Buildings, the mitigation phase is strictly about assessment, containment, and prevention. We focus on removing standing water and using professional-grade equipment to pull moisture out of the air and the building's structure. Only after we’ve confirmed everything is bone-dry can the restoration (the "making it pretty" part) begin.
Immediate Steps for Water Mitigation After Leaks
If you’ve just discovered a leak, don’t panic. Take a deep breath and follow this Emergency Checklist: Water Pipe Burst Cleanup to manage the situation safely.
1. Stop the Flow
The very first thing we need to do is cut off the water. If the leak is coming from a specific fixture, like a toilet or sink, look for the individual shut-off valve behind it. If it’s a burst pipe or you can’t find the source, go straight to the main water shut-off valve.

2. Safety First: Electricity and Hazards
Water and electricity are a dangerous combination. If there is standing water near outlets or appliances, do not walk into it. Go to your breaker panel and shut off the power to the affected rooms. If the water is coming from a "black water" source (like a sewage backup), put on your PPE—gloves, boots, and a mask—before you even think about touching anything.
3. Document Everything
Before you start cleaning up, grab your phone. Take photos and videos of the standing water, the source of the leak, and any damaged furniture or electronics. This documentation is gold when it comes time to talk to your insurance company. Don't throw anything away yet! Your adjuster may need to see the "evidence."
4. Remove Standing Water
Once it's safe, start getting the water out. For small spills, towels and mops work. For larger floods, a wet/dry shop vacuum is your best friend. The faster we get the bulk of the water out, the less time it has to soak into your subfloors and baseboards.
Why Prompt water mitigation after leaks is Essential
We often get asked, "Can I just let it air dry?" The short answer is: only if you want a mold farm in your walls. Water mitigation after leaks must happen fast for several critical reasons:
The 24-48 Hour Window: Mold doesn't wait. It can colonize damp drywall and carpeting in less than two days. Once mold takes hold, the cost and complexity of the project skyrocket.
Structural Integrity: Drywall is basically paper and gypsum. When it gets wet, it loses its strength. If water sits on your ceiling, it can eventually collapse under the weight.
Secondary Damage: This is the damage caused by high humidity. Even if a room didn't get "wet" from the leak, the evaporating water can cause wallpaper in the next room to peel or wooden furniture to warp.
Health Risks: Stagnant water is a breeding ground for bacteria and allergens. Prompt mitigation involves sanitizing the area to keep your family safe.
Common Causes and Signs of Indoor Leaks
Sometimes a leak is obvious—like a pipe spraying water across the basement. But often, the signs are much more subtle. Here in Georgia, where humidity is already high, keeping an eye out for these signs can save you thousands:
The "Mystery" Stain: A yellow or brown ring on your ceiling is a classic sign of a slow leak from a bathroom above or a roof issue.
Warped Flooring: If your hardwood starts "cupping" (the edges are higher than the center) or your laminate feels "spongy," there’s moisture underneath.
The Musty Smell: That "old basement" smell is usually the scent of mold or mildew growing in a dark, damp corner.
Peeling Paint: Water traveling behind a wall will eventually cause the paint or wallpaper to bubble and lose its grip.
Utility Bill Spikes: If your water bill jumps and you haven't been filling a pool, you likely have a hidden leak in your plumbing system.
Identifying Severity: Categories and Classes of Damage
Not all water damage is created equal. When we arrive on-site, we categorize the water and classify the damage to determine the safest and most effective mitigation plan.
The Categories (Contamination Levels)
Category 1 (Clean Water): This comes from a clean source, like a broken supply line or a bathtub overflow. It’s generally safe to handle, but if left for 48 hours, it can turn into Category 2.
Category 2 (Gray Water): This water contains some contaminants. Think dishwasher or washing machine discharge. It might contain soap, hair, or food particles that can grow bacteria.
Category 3 (Black Water): This is grossly contaminated and dangerous. Sources include sewage backups, rising floodwaters from rivers, or stagnant water that has been sitting for days. This requires specialized professional sanitization.
The Classes (Extent of Absorption)
Class 1: Only a small area is affected. Very little moisture has been absorbed by porous materials (like wood or drywall).
Class 2: An entire room is wet. Water has wicked up the walls (usually less than 12 inches) and soaked into carpets.
Class 3: The most severe. Water may have come from overhead, soaking the ceiling, walls, insulation, and flooring.
Class 4: This involves "specialty drying" situations. Water has soaked into materials with very low porosity, like hardwood floors, brick, or concrete, requiring specialized equipment to extract.
The Professional Process of water mitigation after leaks
While a mop is a good start, professional water mitigation after leaks involves a scientific approach called psychrometry (the study of air and water vapor).
Our process at ProShield 24/7 follows these rigorous steps:
Inspection and Moisture Detection: We don't just look at what's wet; we use moisture meters and infrared thermal imaging cameras to find water hidden behind walls and under floors.
Water Extraction: We use powerful, truck-mounted extraction units and submersible pumps to remove thousands of gallons of water much faster than any shop vac could.
Stabilization: We might board up windows or tarp roofs to prevent more water from entering.
Structural Drying and Dehumidification: This is the core of mitigation. We strategically place industrial air movers (high-powered fans) to create airflow and commercial-grade dehumidifiers to pull moisture out of the air.
Sanitization and Antimicrobial Treatment: To prevent mold and eliminate odors, we apply EPA-registered disinfectants to all affected surfaces.
Monitoring: We don't just set the gear and leave. We return daily to take moisture readings, ensuring that the drying process is moving along the "drying curve" as expected.
DIY vs. Professional water mitigation after leaks
It’s tempting to try and handle a leak yourself to save a few bucks. For a small spill on a tile floor, DIY is perfectly fine. But for anything larger, there are risks you should consider:
Hidden Moisture: You might dry the carpet, but the padding underneath remains soaked. This is a recipe for mold growth and subfloor rot.
The Wrong Equipment: Household fans move air, but they don't dry air. Without a commercial dehumidifier, you're just blowing moist air around, which can lead to secondary damage.
Safety Hazards: Professionals have the PPE and training to handle Category 2 and 3 water safely. Wading into sewage or gray water without protection can lead to serious illness.
Insurance Requirements: Many insurance companies require proof that the property was dried to IICRC (Institute of Inspection Cleaning and Restoration Certification) standards. If you do it yourself and mold appears later, they may deny your claim.
Insurance, Costs, and Prevention Strategies
Navigating insurance can be as stressful as the leak itself. Generally, homeowners insurance covers sudden and accidental water damage—like a pipe that bursts while you’re at work. However, they often exclude gradual damage (a slow leak you ignored for six months) and flooding from external sources (which requires a separate flood insurance policy).
How much does it cost?
According to industry data, the national average cost for water damage restoration ranges from $1,300 to $6,400, depending on the category and class. Mitigation of black water can cost nearly double that of clean water because of the intensive sanitization required.
Prevention is the Best Mitigation
You can't always prevent a pipe from bursting, but you can lower your risk. Check out Water Damage Repair 101: How to Clean Up Your Home for deep-dive tips, but here are the basics:
Install Leak Detectors: These small, inexpensive sensors sit under sinks and near water heaters, alerting your phone the second they detect moisture.
Check Your Hoses: Replace those old rubber washing machine hoses with braided stainless steel ones.
Clean Your Gutters: Clogged gutters send water down your foundation and into your crawl space or basement.
Know Your Shut-off: Make sure everyone in the house knows exactly where the main water valve is.
Maintain Your HVAC: A clogged condensate line can send gallons of water through your ceiling.
Frequently Asked Questions about Water Leaks
What are the signs of hidden water damage?
Look for peeling paint, a musty odor that won't go away, or a "spongy" feel to your floors. If your water bill has increased without explanation, that’s a major red flag. You can also use a pencil to trace the edge of a water stain on the ceiling; if the stain grows past the line, the leak is active.
Does insurance cover all types of leaks?
No. Insurance typically covers "sudden and accidental" events. It rarely covers damage caused by a lack of maintenance (like a roof you knew was leaking) or "water from the ground up" (flooding). Always review your policy annually to check for sewer backup endorsements or mold riders.
How long does the drying process take?
In most cases, professional drying takes between three and five days. However, if the damage is severe (Class 3 or 4) or involves dense materials like hardwood or concrete, it can take longer. We use moisture meters to confirm the "dry goal" has been reached before we remove our equipment.
Conclusion
Dealing with a water leak is overwhelming, but you don't have to do it alone. At ProShield 24/7, we understand that when your home is flooding, every second counts. That’s why we offer 24/7 emergency response throughout Georgia.
Our team provides fast local dispatch, arriving on-site with the professional drying equipment and expertise needed to stop the damage in its tracks. From initial extraction to final sanitization, we handle the hard work so you can focus on getting your life back to normal.
Don't wait for mold to start growing or for your floors to warp. If you’re facing a water emergency, click here for more info about our services or give us a call right now. We’re here to protect your home, 24/7.
